
Is your waders leaking? That’s a real bummer, but luckily you can often repair waders yourself quite well. In this blog, you’ll read exactly what you need and how to make a standard or breathable pair of waders waterproof again.
Contents
- Why repairing waders is often worth the effort
- What do you need to repair waders?
- Repairing waders with small holes or tears
- Repairing breathable waders: what should you watch out for?
- Common mistakes when repairing waders
- Video explanation
- Prefer a new pair of waders instead?
Why repairing waders is often worth the effort
A leak in your waders doesn’t automatically mean you need a new pair. In many cases, you can repair waders quickly, affordably, and effectively yourself. Especially with small holes, worn spots, or minor damage, a good repair kit is often enough to make your waders usable again.
For anglers, this is ideal. You save money, extend the life of your gear, and prevent a small leak from turning into a bigger problem. The sooner you act, the better the chance the repair will hold strong and last.
What do you need to repair waders?
Before you start repairing your waders, it’s important to have the right materials ready. This way you work cleaner, faster, and achieve a better finish.
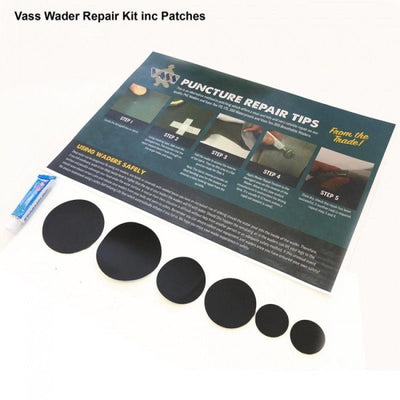
For most repairs, you’ll need the following:
- a repair kit or sealant suitable for waders
- painter’s tape or masking tape without aggressive adhesive residue
- a clean, dry workspace
- optional water to help locate the leak
- sufficient drying time according to the product instructions
Always use a product suitable for your waders’ material. Not every sealant bonds well to PVC, nylon, neoprene, or breathable fabrics.
Repairing waders with small holes or tears
Got a small hole or minor damage? Then repairing your waders is usually something you can do yourself quite easily. Follow the steps below carefully for the best result.
Step 1: Carefully locate the leak
The first step in repairing waders is, of course, locating the exact leaking spot. Sometimes it’s immediately visible, but often it’s a tiny hole that’s not easy to spot.
A common method is to carefully fill the waders with water and then watch where the water escapes. Do this slowly and controlled so you can clearly mark the damaged spot.

Step 2: Tape off the outside
Have you found the leak? Then tape off the damage from the outside using masking tape or painter's tape. Preferably use a good tape that leaves no adhesive residue. This prevents further contamination or damage to the material.
The tape prevents the sealant from leaking through the hole during repair. This allows you to work much more precisely on the inside.

Step 3: Make sure you can reach the inside well
For a neat repair, it’s important to have good access to the inside of the leak. Turn or fold the waders so the inside of the fabric is accessible. This is where a repair product usually adheres best and most firmly.
Work calmly and make sure the material is clean and dry before proceeding. Dirt, moisture, or grease can significantly reduce adhesion.

Step 4: Apply the sealant or repair kit
Now you can apply the sealant or repair kit to the damaged area. Spread the product evenly over the leak and slightly around the damage. This increases the chance that the hole is fully sealed.
Then let the product dry thoroughly. Drying time varies by brand and type of repair product. In many cases, drying takes between 8 and 12 hours. Always read the instructions on the packaging carefully.

Step 5: Check if the waders are sealed again
Once the product has fully cured, it’s time to check if the waders repair was successful. Inspect the repaired spot carefully and, if needed, test again with a little water.
If you still see an opening or doubt the seal, repeat step 3 and step 4 until the leak is fully sealed. An extra thin layer often works better than applying too much product too quickly.

Step 6: Remove the tape and let everything rest completely
If the leak is neatly sealed, carefully remove the masking tape from the outside. Preferably, give the waders some extra time to rest before using them again in wet conditions.
This way, you can be sure the repair has fully cured and is immediately resistant to water pressure while fishing.
Repairing breathable waders: what should you watch out for?
Repairing a breathable waders suit requires a bit more care than a standard model. This is because breathable materials are constructed differently and are often lighter and more technically finished.
With a breathable waders suit, it is especially important to use a repair product suitable for breathable fabrics. Avoid using random glue or universal sealants. These can cause the fabric to become stiff, reduce breathability, or eventually come loose again.
Always work on a clean, dry surface here as well, and apply the product neatly and sparingly. With breathable waders, precision is more important than using a lot of product.
Extra tip for repairing breathable waders
Unsure where the leak is exactly? Let the waders dry completely first, then carefully check high-stress or wear areas like knees, seams, seat area, and the transition to boots or socks. These spots are often where problems first appear in practice.
Common mistakes when repairing waders
Repairing waders isn’t difficult, but the same mistakes are often made. So pay attention to the following points:
- repairing on a wet or dirty surface
- using the waders again too soon without full drying time
- using an unsuitable repair product
- not treating the damage area around the leak thoroughly enough
- pulling or folding too hard during drying
So take a bit more time for a neat repair. In practice, this often results in a much better and more durable outcome.
Video tutorial on repairing waders
Watch a practical video tutorial below on how to repair a standard pair of waders.
Video tutorial on repairing breathable waders
If you have a breathable model, the video below is definitely worth watching.
Prefer a new pair of waders instead?
Not every leak can be neatly repaired. Especially with larger tears, worn seams, or heavily aged material, replacement is sometimes the smartest choice. Fortunately, we offer a wide range of waders for different uses and budgets.
Whether you’re looking for a sturdy PVC wader, a warm neoprene model, or a lighter nylon wader, there’s always a suitable option. Below you’ll find a selection of our favourite models.
Conclusion
Repairing waders is often well worth the effort. Small holes and minor damage can usually be fixed yourself with the right repair kit and a bit of patience. Work neatly, allow enough drying time, and always check carefully that the leak is fully sealed.
How to extend the lifespan of your waders and get back to the bank dry and comfortable faster.
About the author